
Setting Up an AI Client
ATLAS.ti includes a built-in MCP server that runs locally on your computer. To use the MCP integration, you enable this server in ATLAS.ti and then connect an MCP client to it. There are three ways to connect a client:
- Using the MCP bundle – for Claude Desktop, which connects using the ATLAS.ti bundle.
- Using LM Studio – a one-click button that opens LM Studio and adds the ATLAS.ti MCP server for you.
- Using a manual HTTP configuration – works with any MCP client that can connect to an HTTP server. The steps below use Claude Code as an example, but the same configuration applies to other HTTP-capable clients.
ATLAS.ti works with a range of MCP clients – see Tested AI Clients. For any client not described here, use the HTTP configuration below and refer to that client's own documentation for how to add an MCP server.
The MCP server on macOS requires macOS 15 or newer. ATLAS.ti itself runs on macOS 13 and later, but the MCP integration is available only on macOS 15 and above.
Enable the MCP server
Whichever connection method you use, first enable the MCP server in ATLAS.ti.
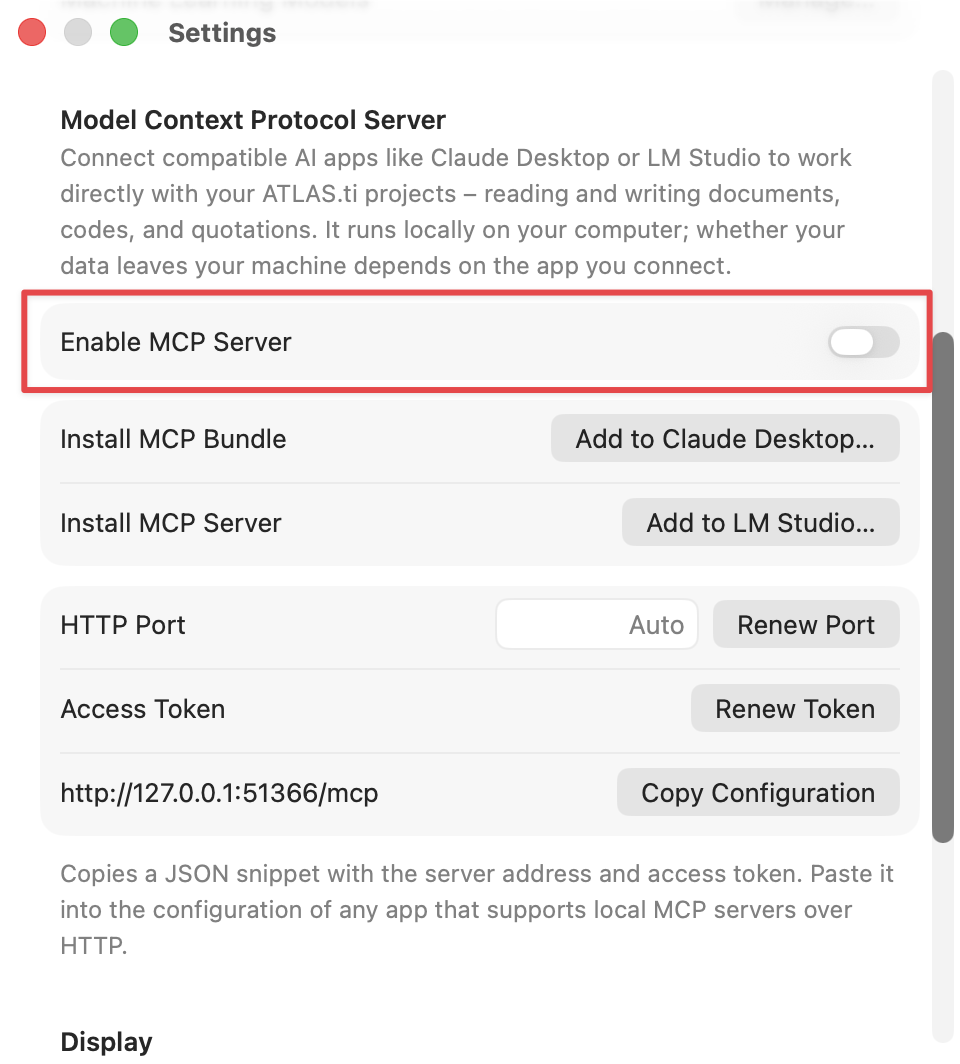
In ATLAS.ti, open Settings and, in the Model Context Protocol Server section, turn on Enable MCP Server.
Using the MCP Bundle (Claude Desktop)
The MCP bundle (a .mcpb file) is the easiest way to connect Claude Desktop. This bundle method is specific to Claude Desktop; for other clients, see Using LM Studio or Using a manual HTTP configuration below.
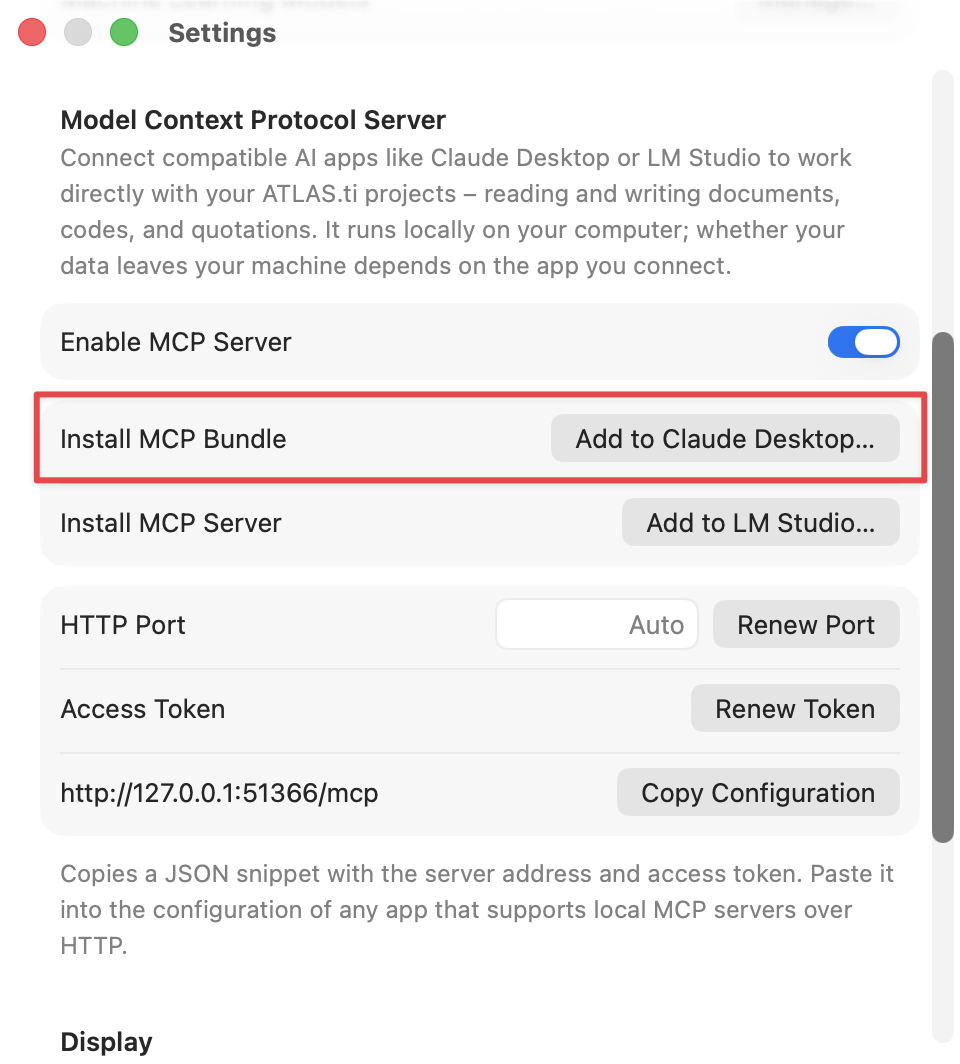
In ATLAS.ti Settings, in the Model Context Protocol Server section, click Add to Claude Desktop… next to Install MCP Bundle.
Claude Desktop opens and prompts you to install the extension. Click Install, and in the confirmation pop-up click Install again to complete the installation.
Claude Desktop may prompt you to install the command line developer tools. This request comes from Claude Desktop, not ATLAS.ti, and you can cancel it – these tools are not required for the ATLAS.ti MCP server.
If you already had installed an older version of the MCP bundle, do the following in Claude: Go to File > Settings > Extensions > Advanced Settings > Install Extension, click Uninstall and then click Install to install the new version.
Once the setup is complete, launch ATLAS.ti and enter a prompt in your client to list all your ATLAS.ti projects. The client should list all your projects.
Using LM Studio
LM Studio can connect to the ATLAS.ti MCP server with a single click. ATLAS.ti adds the server configuration to LM Studio for you, so no manual configuration is needed.
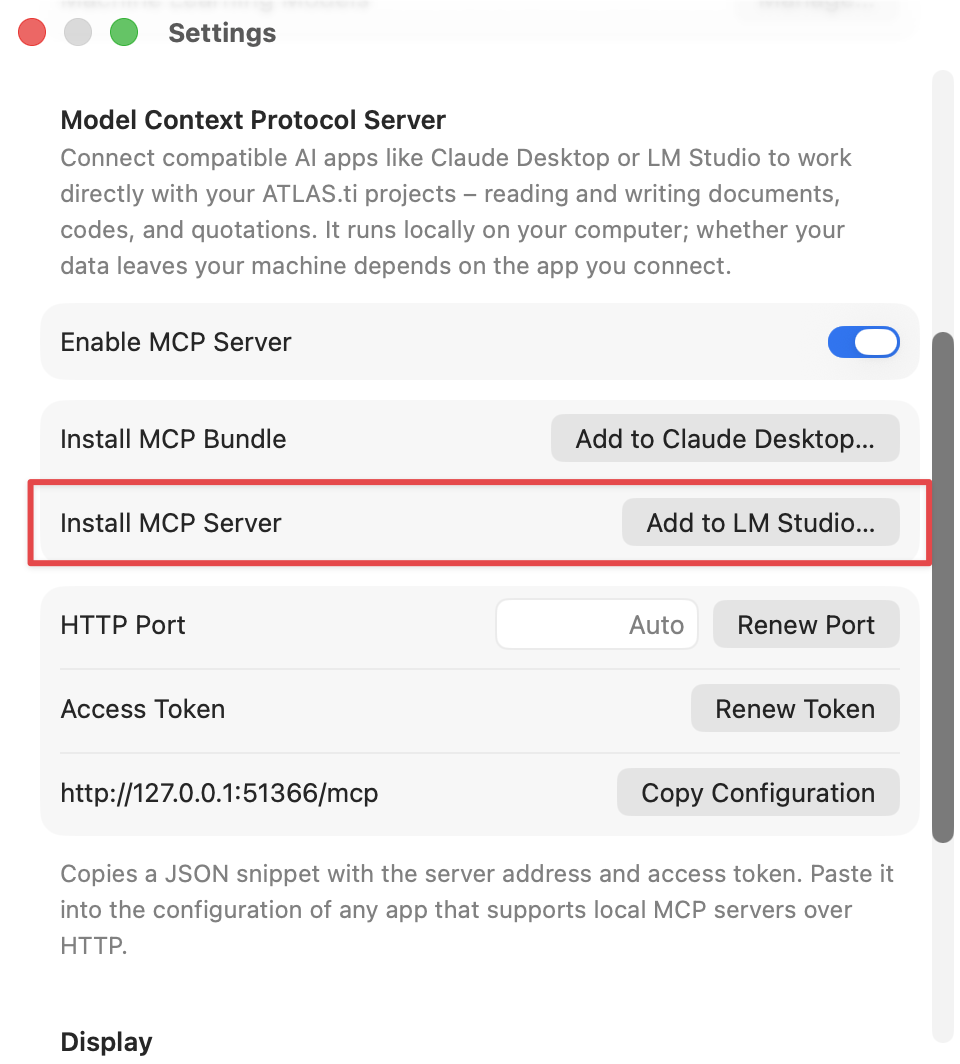
In ATLAS.ti Settings, in the Model Context Protocol Server section, click Add to LM Studio… next to Install MCP Server.
LM Studio opens and adds the ATLAS.ti MCP server automatically. Confirm the prompt in LM Studio if you are asked.
In LM Studio, choose a model that supports tool use (function calling). The MCP integration relies on tool use, so a model without it cannot work with your ATLAS.ti projects.
Once the setup is complete, launch ATLAS.ti and enter a prompt in LM Studio to list all your ATLAS.ti projects. LM Studio should list all your projects.
Using a manual HTTP configuration
The ATLAS.ti MCP server also exposes a local HTTP endpoint, so any MCP client that can connect to an HTTP server can use it. In general, connecting another client involves: enabling the MCP server in ATLAS.ti (it is disabled by default – see Enable the MCP server above), installing and configuring your MCP-compatible AI client, configuring it to connect to the ATLAS.ti MCP server using the configuration below, and finally opening an ATLAS.ti project and interacting with it through the client.
The steps below use Claude Code as a worked example; the same configuration works with other HTTP-capable clients (for example, OpenAI Codex, Goose, or the Gemini CLI). Refer to your client's documentation for where to add an MCP server.
Step 1: Copy the MCP server configuration from ATLAS.ti
In ATLAS.ti, open Settings and click Copy Configuration.
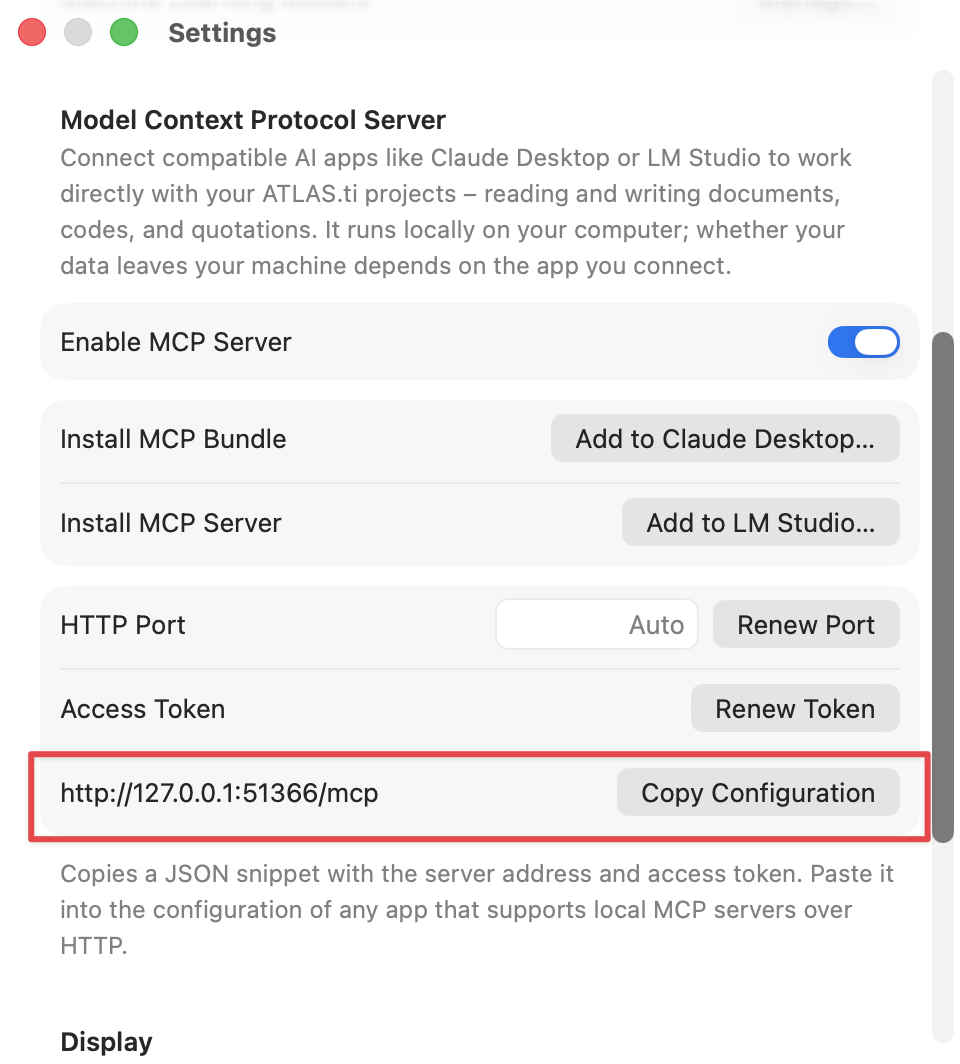
Keep the configuration details somewhere handy (for example, a text editor), as you will need them in the next step. Here is an example configuration:
{
  "mcpServers": {
    "ATLAS.ti": {
      "headers": {
        "Authorization": "Bearer YFNqUs+T2o5ZZljQsTYrTF6eAhgzj6NQVG0Kf0IZwXg="
      },
      "type": "http",
      "url": "http://127.0.0.1:57000/mcp"
    }
  }
}
Step 2: Add the configuration to your client
Each client has its own way to register an MCP server. Use the configuration from Step 1 and follow your client's documentation.
For Claude Code, which you can use as a stand-in for other HTTP clients:
If you do not have Claude Code yet, install it by following the Quickstart.
Add the ATLAS.ti MCP server by following the Connect to MCP servers instructions.